Documentation Index
Fetch the complete documentation index at: https://ormilabs.com/docs/llms.txt
Use this file to discover all available pages before exploring further.
If you plan to update or redeploy your subgraph in the future, create and use a tag before you start querying the endpoint.
Tags let you hot-swap new deployments under the same URL later without changing your front-end code. Prerequisite
Getting started
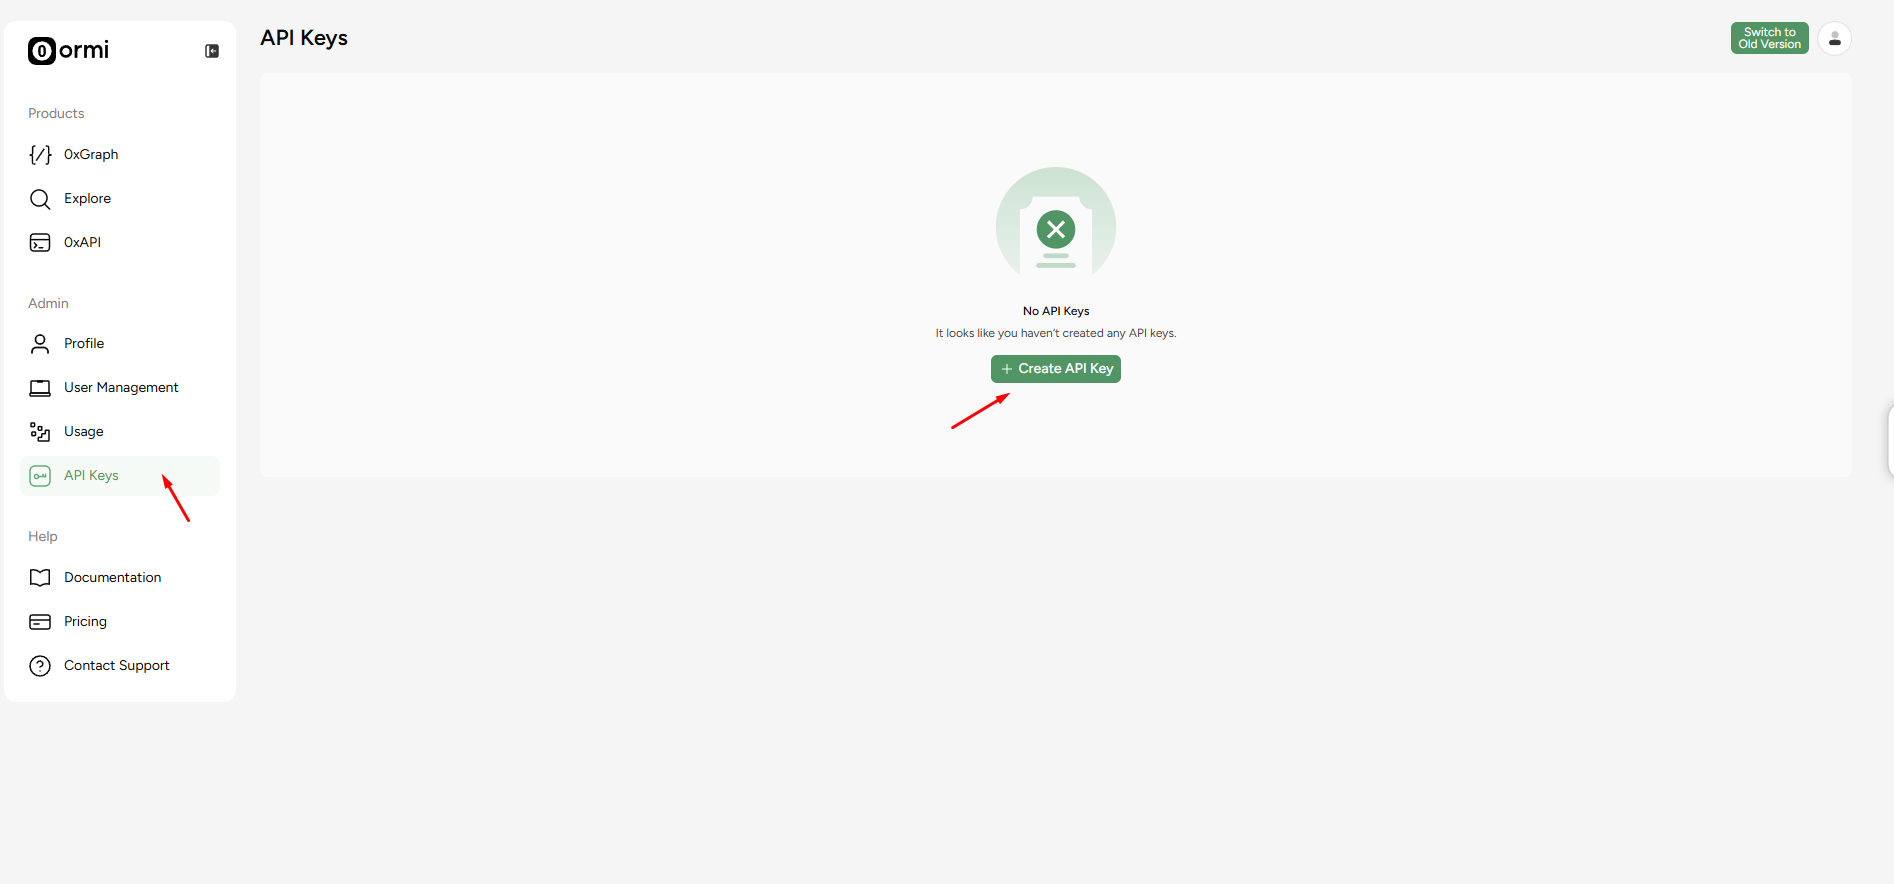
- Log in to Ormi and go to your dashboard.
- From the dashboard, create an API key.
Note: Keep this page open, we’ll need the API key later to deploy a subgraph.
Install Graph CLI
On your local machine, run the following in your terminal:
npm install -g @graphprotocol/graph-cli
Create a directory for your subgraph
mkdir katana-blocks
cd katana-blocks
Initialize Node project
Run bash in the directory folder
Install dependencies
npm install --save-dev @graphprotocol/graph-ts
npm install --save-dev assemblyscript
Create the required files
You will need:
- subgraph.yaml
- schema.graphql
- mappings/blocks.ts
- abis/Dummy.json
subgraph.yaml
specVersion: 0.0.5
description: Blocks indexer for Katana
schema:
  file: ./schema.graphql

dataSources:
  # We declare a contract data source so we can attach a blockHandler.
  # The "Dummy" ABI is unused but required by the manifest when kind=ethereum/contract.
  - kind: ethereum/contract
    name: KatanaBlocks
    network: katana
    source:
      address: "0x0000000000000000000000000000000000000000"  # not used
      abi: Dummy
      startBlock: 1
    mapping:
      kind: ethereum/events
      apiVersion: 0.0.7
      language: wasm/assemblyscript
      entities:
        - Block
      abis:
        - name: Dummy
          file: ./abis/Dummy.json
      # This is the key: run our handler every block
      blockHandlers:
        - handler: handleBlock
      file: ./mappings/blocks.ts
Dummy.json is required because every data source must include at least one ABI, even if unused. Just put [] inside it.
schema.graphql
type Block @entity(immutable: true) {
  id: ID!            # we will use the block number as the ID
  number: BigInt!
  timestamp: BigInt!
  hash: Bytes!
  parentHash: Bytes!
}
Mapping files in typescript
import { Block as BlockEntity } from "../generated/schema";
import { ethereum } from "@graphprotocol/graph-ts";

export function handleBlock(block: ethereum.Block): void {
  // Use block number as the stable ID
  let id = block.number.toString();

  let entity = new BlockEntity(id);
  entity.number = block.number;
  entity.timestamp = block.timestamp;
  entity.hash = block.hash;
  entity.parentHash = block.parentHash;
  entity.save();
}
Directory layout
katana-blocks/
├─ abis/
│  └─ Dummy.json
├─ mappings/
│  └─ blocks.ts
├─ schema.graphql
└─ subgraph.yaml
node_modules/ after installing dependencies - that’s expected.
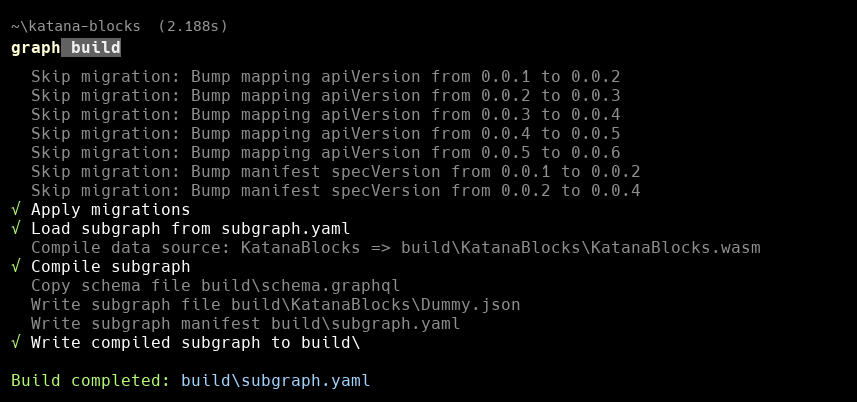
Build the subgraph
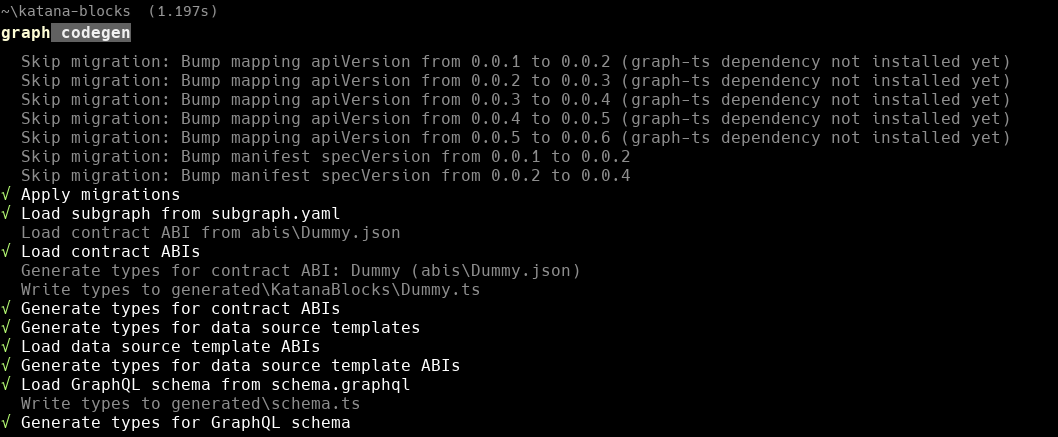
Generate types:
Now run:
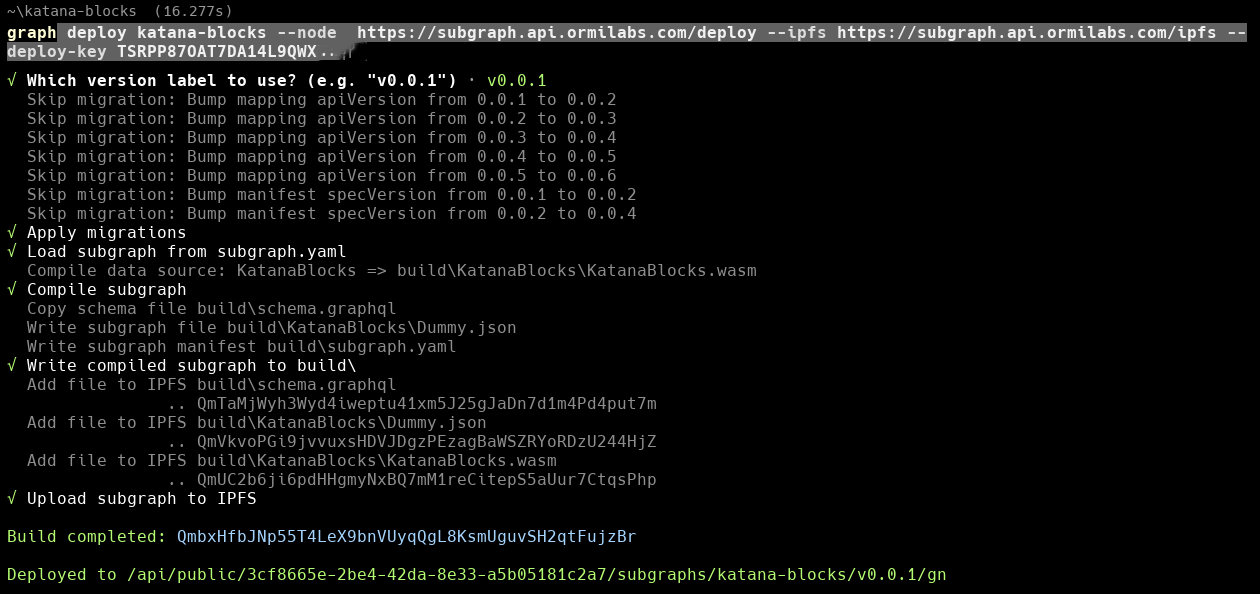
Deploy the Subgraph to Ormi 0xGraph
Return to your API key from the dashboard.
Replace graph-name and API key with your actual values
graph deploy <graph-name> --node https://subgraph.api.ormilabs.com/deploy --ipfs https://subgraph.api.ormilabs.com/ipfs --deploy-key <API key>
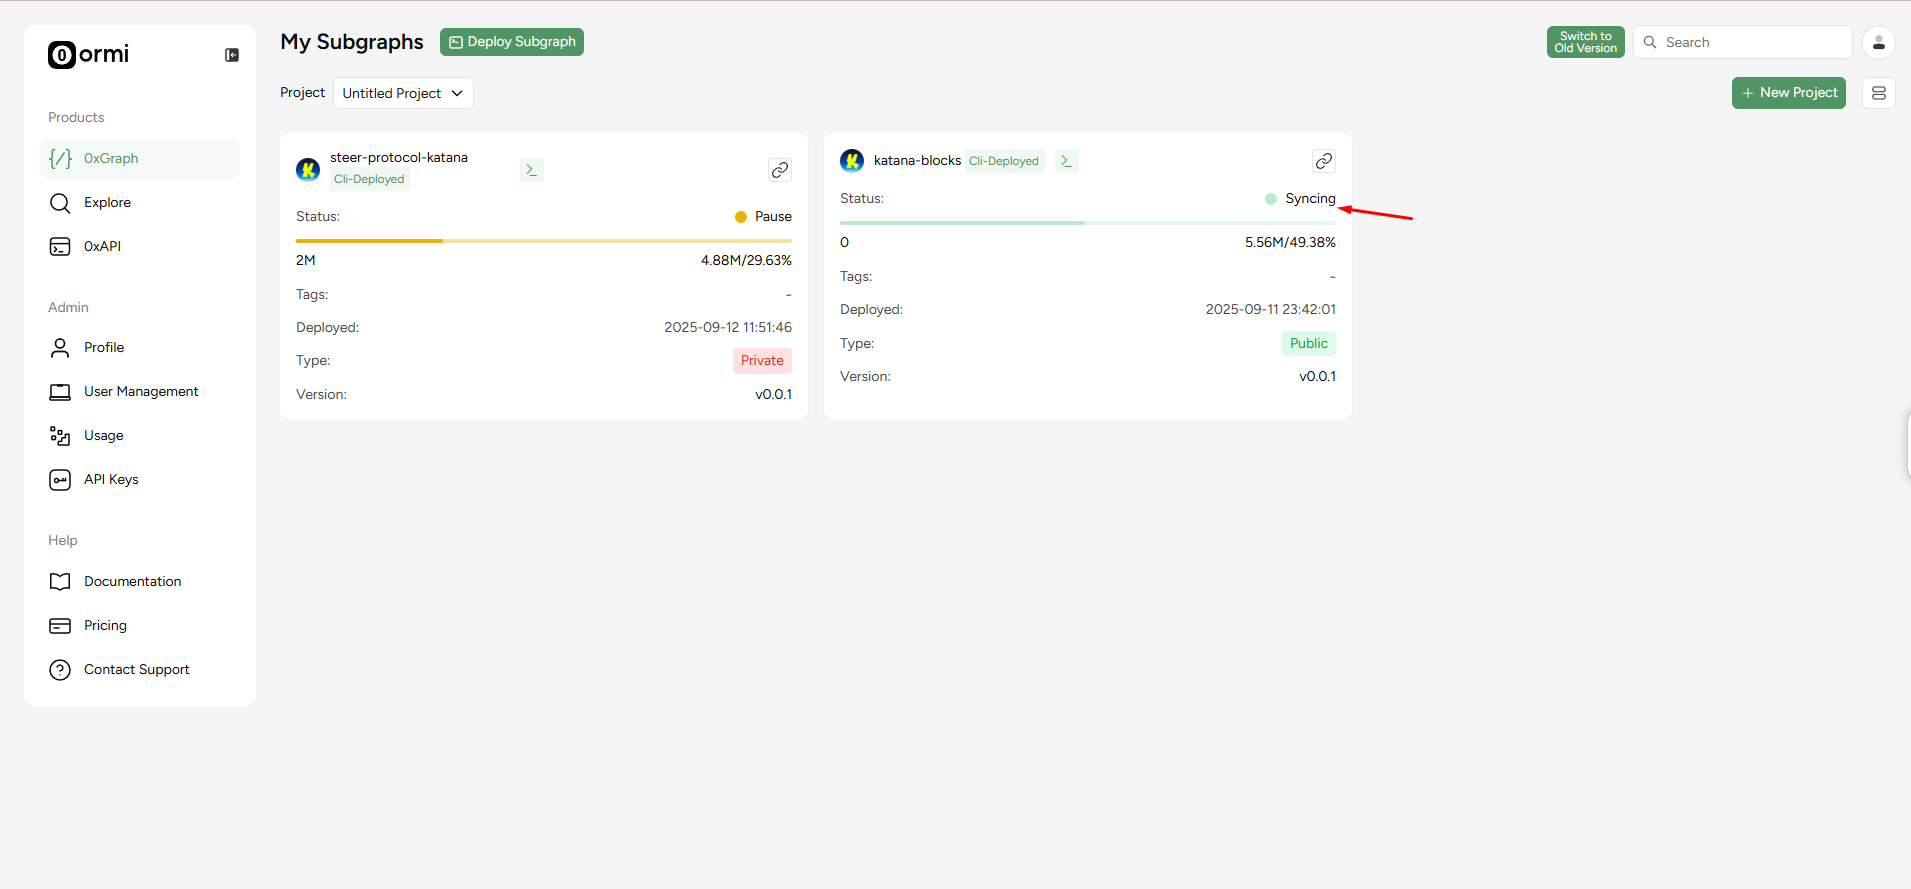
Track sync status
You can check syncing in the dashboard by going to the Subgraphs tab:
Query Katana blocks
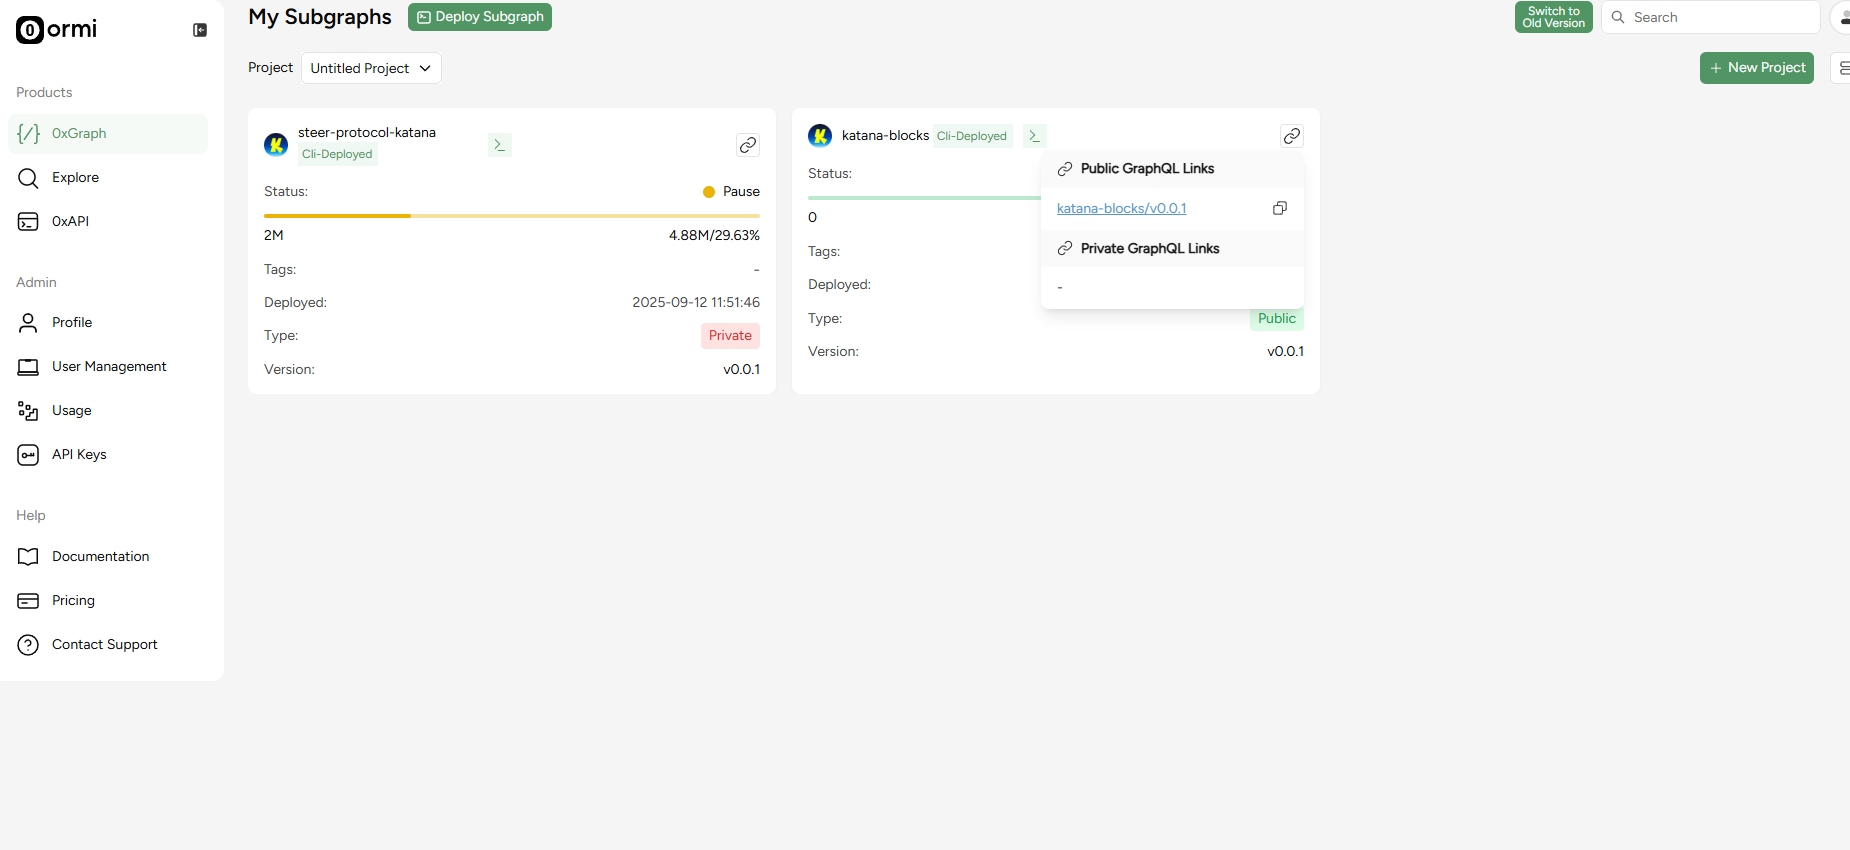
Click on the button where the red arrow is pointing.
Once synced, click the GraphQL endpoint link in the dashboard.
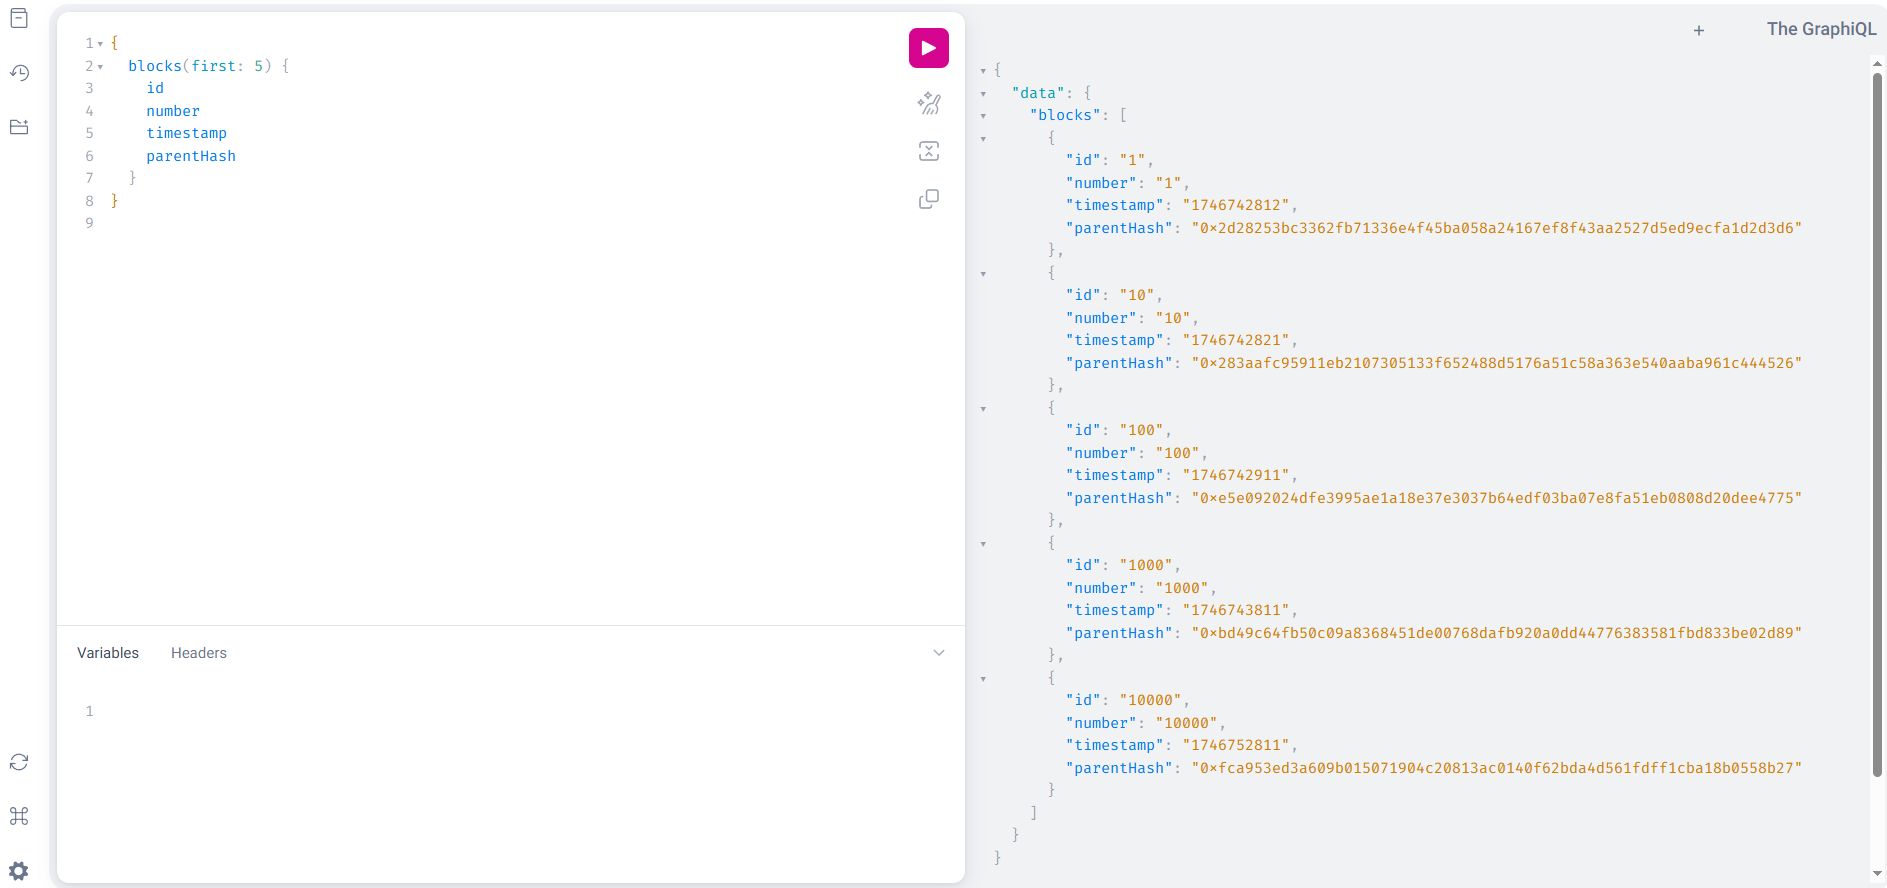
Sample query
Run this query to fetch the latest 5 blocks
{
  blocks(first: 5) {
    id
    number
    timestamp
    parentHash
  }
}
Done!
You now have a live subgraph indexing Katana blocks through Ormi’s 0xGraph.
Next steps